

Table of contents
- Episode 27: HTML 5
- Introduction
- Writing Our Very First Webpage
- Developer Fundamental 3
- HTML Tags
- Heading Tags [<h1>, <h2>, <h3>, <h4>, <h5> and <h6>]
- Paragraph Tag <p>
- Bold Tag <b> vs Strong Tag <strong>
- Italicize Tag <i> vs Italicize Tag <em>
- Ordered List Tag <ol>
- Unordered List Tag <ul>
- Self-Closing Tags
- Adding an Image to a Website <img>
- Anchor Tag <a>
- HTML Form <form>
- Div Tag<div> and Span Tag<span>
- Comment Tag <!-- -->
- HTML vs HTML 5
Udemy Course: Complete Web & Mobile Designer; UI/UX, Figma, +more by Andrei Neagoie & Daniel Schifano.
Episode 27: HTML 5
Introduction
Yippee! Finally we are now in the coding sections of the course.
We will start off from HTML. But, before you can think of coding at all, you need to get a Text Editor in place. A Text Editor is a program that allows us to write code.
In this course, we will be making use of "Sublime Text" to write our codes. You can download Sublime Text through the link below: https://www.sublimetext.com/download

Writing Our Very First Webpage
To write the code for our very first webpage, we need to open the Text Editor we downloaded which is Sublime Text.
If we check the bottom right of our Sublime Text, by default it is Plain Text. But since we are starting with HTML, we need to toggle from Plain Text to HTML.
To toggle from Plain Text to HTML; we need to click on the Plain Text in the bottom right of our Sublime Text, this will provide us with many coding languages but we will be sticking with HTML for now.
Below is the code for our first basic website. This is typically how any HTML code is structured.
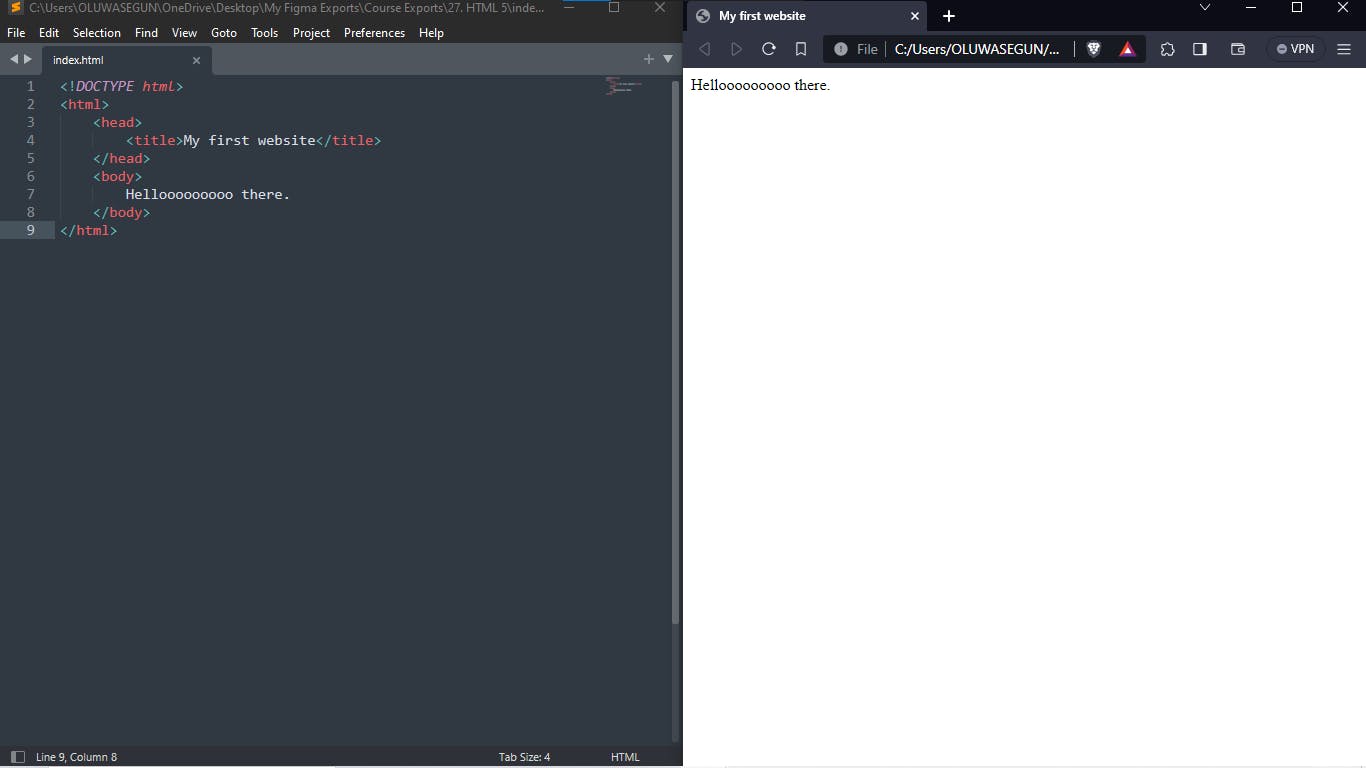
As seen in the screenshot above, the code written in my Sublime Text Editor on the Left-hand Side is displayed in my Web Browser on the Right-hand Side.
Click on my CodePen link below, to view the source code of "our very first website":
https://codepen.io/engrshege/pen/ZEPBNeo
The HTML Code Of Our Very First Webpage Is Explained Below
<!DOCTYPE html> This is used to define the type of document we are working on, which is HTML.
<html> This is the opening tag of our html code
</html> This is the closing tag of our html code.
Note: The combination of our opening tag <html> and closing tag </html> refers to the embodiment of our entire html code.
- <head> </head> The head is a place where we can place in information like the title of our webpage, link to our css file and other meta data
Note: Whatsoever is written in the head section is not directly revealed on our website.
- <body> </body> All the code written in the body section is revealed on our website.
Note: Our very first website does not contain a tag for either Heading or Paragraph which doesn't make the structuring feel right because the 'Helloooooooo there' should not be left in the body tag just like that. We will look into the Heading and Paragraph Tags as we go along.
Developer Fundamental 3
As a developer, you really want to understand how things work and what they mean; it is recommended to Google and get answers because there are tons of free resources out there for you to fully get understanding on a challenge you may come across.
HTML Tags
If you check out the list of HTML Tags at W3Schools via the link below: w3schools.com/tags
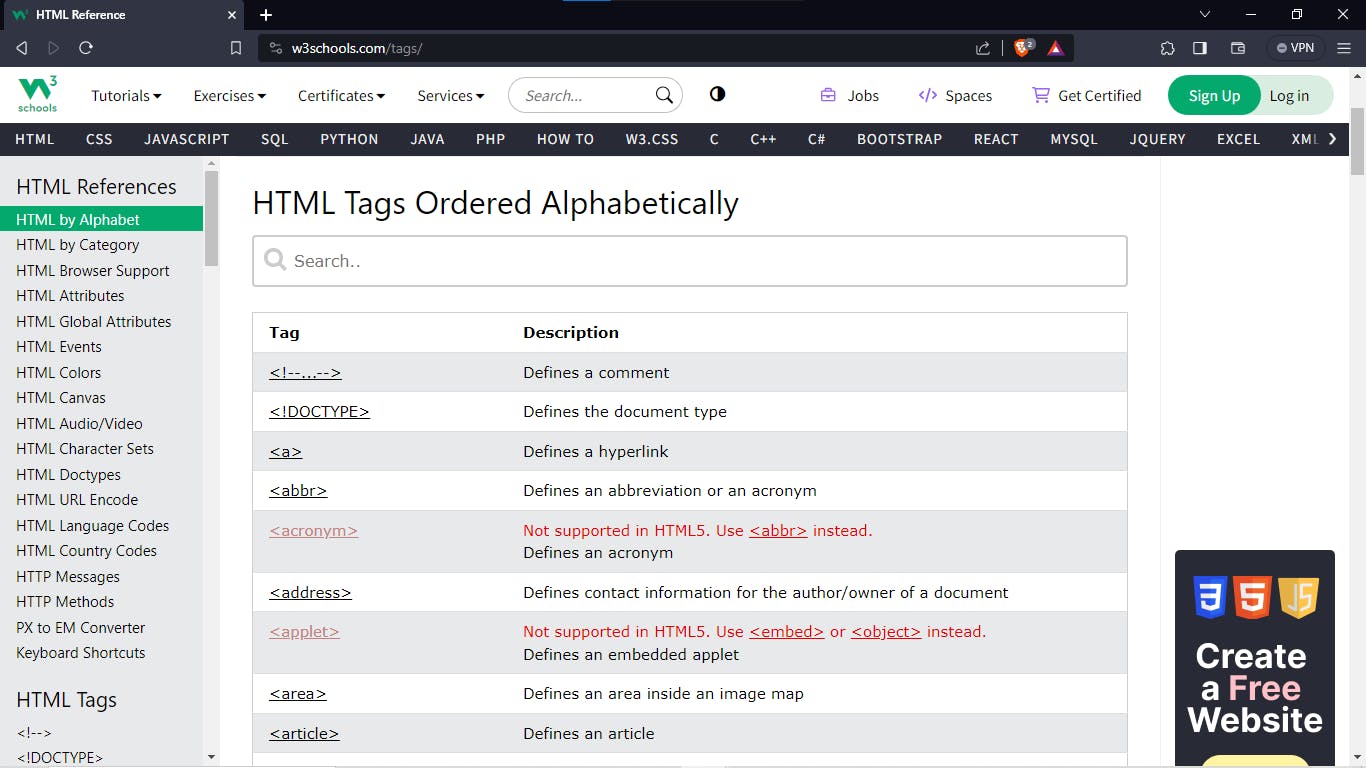
Through this list, you will know that we have a lot of HTML Tags. But in this course, we will be focusing on the HTML Tags that is mostly used in building webpages.
Heading Tags [<h1>, <h2>, <h3>, <h4>, <h5> and <h6>]
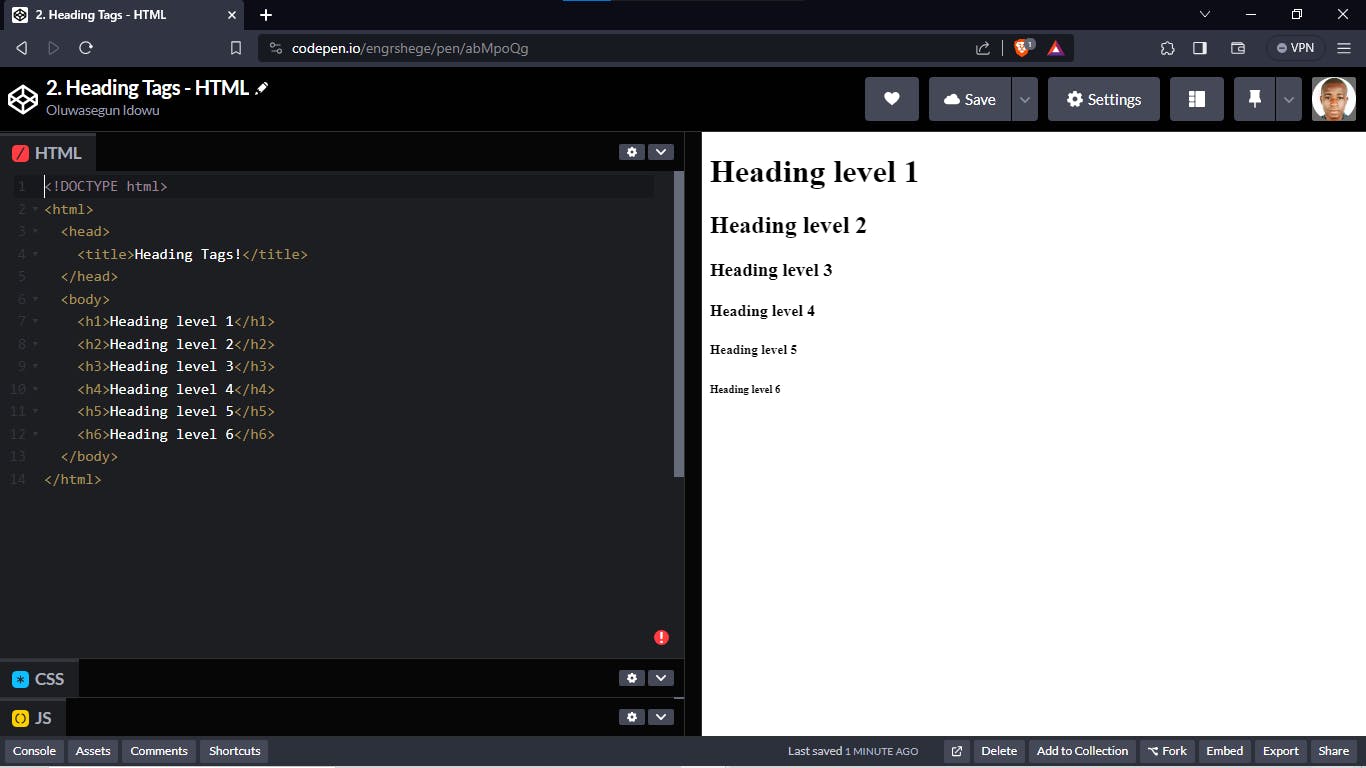
Let's dive into HTML Tags starting from the heading tags which are: <h1>, <h2>, <h3>, <h4>, <h5> and <h6>
We have six ranges of the heading tags. Let's test each ranges of the Heading Tags for us to see how heading tags are used.
Check the screenshot below from my CodePen:
Click the link below to check the code for our Heading Tags on my CodePen account:
https://codepen.io/engrshege/pen/abMpoQg
Paragraph Tag <p>
The next tag is called Paragraph Tag. This is used to structure a sentence as a paragraph.
Our code is now updated with Paragraph Tag below:

Click the link below to check the code for our Paragraph Tags on my CodePen account:
https://codepen.io/engrshege/pen/QWodLXr
Note: The difference between Tags and Element.
Tag is a fragment of an element. i.e <h1>
Element is the entire block of functionality with content inside. i.e <h1>Content is this sentence.</h1>
Bold Tag <b> vs Strong Tag <strong>
<b> is used to bold the text of our content.
The <b> tag is not recommended anymore to bold our text in HTML 5. Although it still works but the <strong> tag is now the recommended tag to bold text in HTML 5.

Click the link below to check the code for our Bold Tag vs Strong Tag on my CodePen account:
https://codepen.io/engrshege/pen/yLwgLoW
Italicize Tag <i> vs Italicize Tag <em>
The <i> tag was formerly used in HTML to italicize texts. But due to issues with programs such as screen readers not being able to identify the italicize tag <i> properly. The <em> tag is now the recommended tag to italicize text in HTML 5.
Click the link below to check the code for our Italicize Tag <i> vs Italicize Tag <em> on my CodePen account:
https://codepen.io/engrshege/pen/YzgNzjr
Note: The reason why changes were made to <b> tag and <i> tag being replaced with <strong> tag and <em> tag respectively is because of the movement towards something called Semantic HTML. We will look into this in a later lesson of this course.
Ordered List Tag <ol>
The Ordered List Tag <ol> is used in arranging a list of items in ascending order of numbers.
Let's look at the example we have in the code below:

Click the link below to check the code for our Ordered List Tag <ol> on my CodePen account:
https://codepen.io/engrshege/pen/XWGpWOd
Note:
<ol> tag stands for ordered list tag.
<li> tag is used to identify the items to be listed by the <ol> tag.
Unordered List Tag <ul>
If we want to make a list of items excluding the numbering up like we had in the Ordered List Tag, we can make use of an Unordered List Tag <ul>.
The Unordered List Tag <ul> will list the items with bullets. Let's look at the code below:
Click the link below to check the code for our Unordered List Tag <ul> on my CodePen account:
https://codepen.io/engrshege/pen/oNVBNKo
Self-Closing Tags
There are a few elements that don't have this closing syntax </>. Those type of elements are called self-closing tags.
Now, let's take a look at tags that don't need a closing tag.
Examples of such tags are:
<br> ==> Used for Line Breaks
<hr> ==> Used for Horizontal Line
See the code below to check how they are used in an HTML file:
Click the link below to check the code for examples of Self-Closing Tags on my CodePen account:
https://codepen.io/engrshege/pen/ZEPLYpp
Adding an Image to a Website <img>
Let's dive into how to add an image to a website.
The element used in adding images a website is also a self-closing tag which is written below:
<img src="https://images.crowdspring.com/blog/wp-content/uploads/2022/08/17030806/aple-logo-4.png" alt="Apple Logo" height="150" width="125">
img ==> This represents the image tag.
src ==> This is an attribute to state the location of the image to be used.
alt ==> This means an alternate text, in case the image could not be found or located.
height ==> With this you can set the height your image will take on your website.
width ==> With this you can set the width your image will take on your website.
Check the code below to see how I added the link of an Apple Logo from CrowdSpring to an HTML file:
Click the link below to see how I used the <img> tag to add an image to HTML file on my CodePen account:
https://codepen.io/engrshege/pen/WNmRpbq
Anchor Tag <a>
Anchor Tag <a> is used in an HTML file to create a link to another page.
This is an example of how to use an anchor tag <a>:
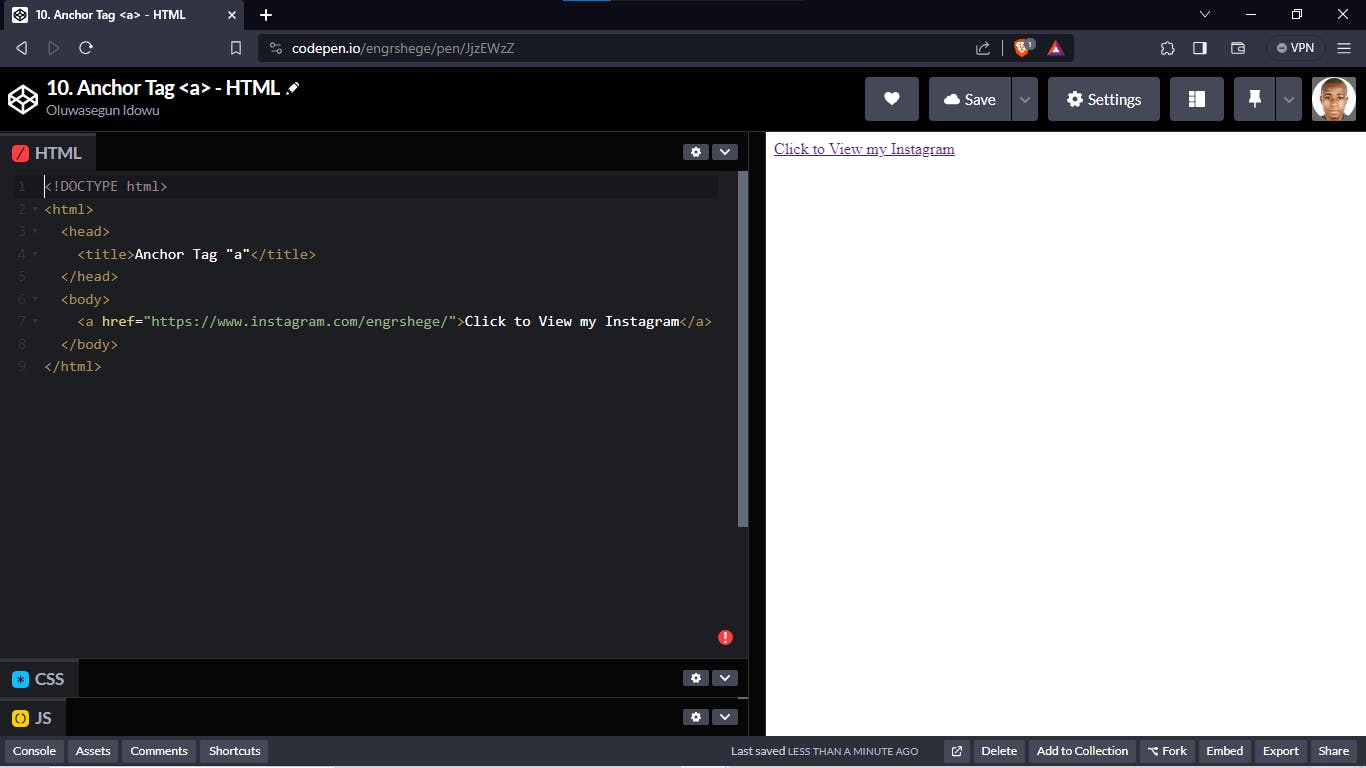
Click the link below to check how the Anchor Tag <a> is used on my CodePen account:
https://codepen.io/engrshege/pen/JjzEWzZ
HTML Form <form>
This is an important aspect in HTML as we need Form for our Login Page, Registration Page and many other input types.
Below is the code I wrote for a basic registration form:
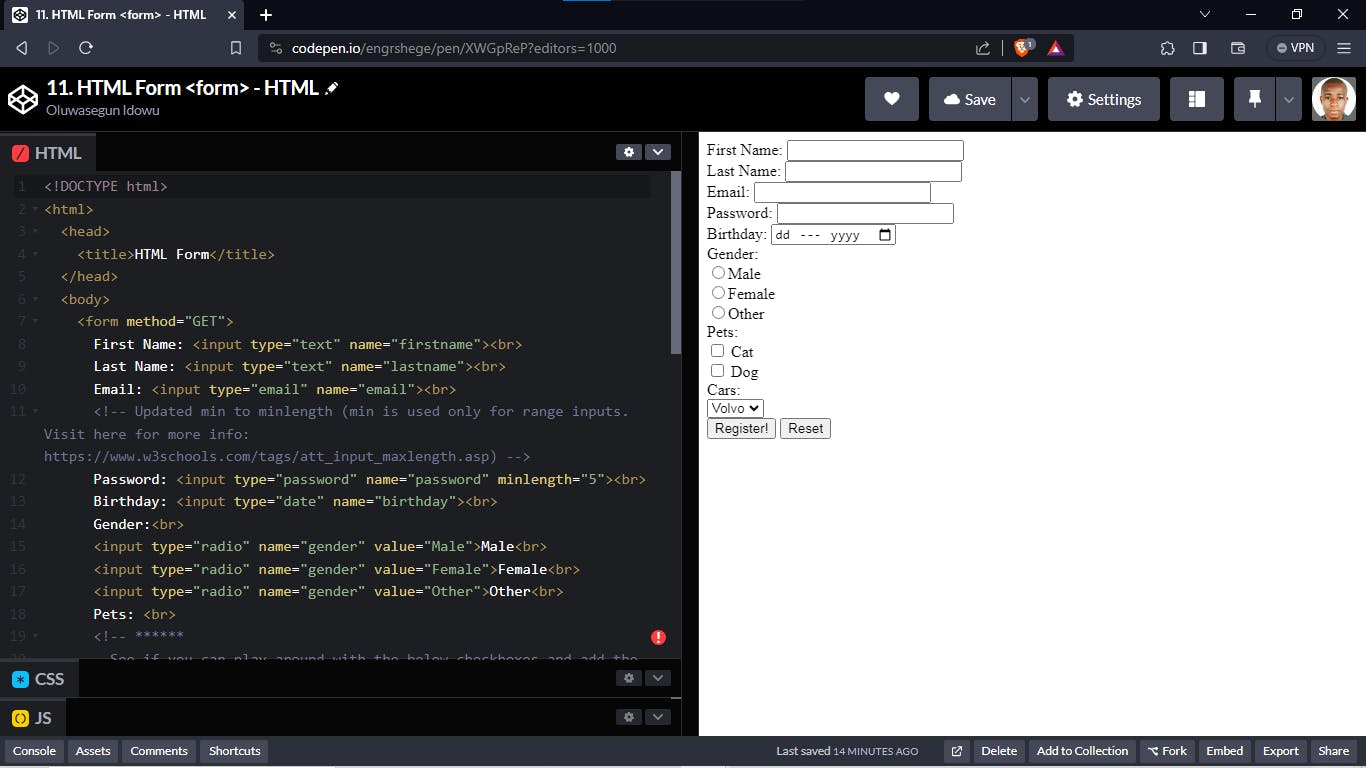
Click the link below to check the complete code for the HTML Form on my CodePen account:
https://codepen.io/engrshege/pen/XWGpReP
Div Tag<div> and Span Tag<span>
The <div> tag and <span> tag are used to represent the part of the webpage, the <div> tag is used as a block part of the webpage, and the <span> tag is used as an inline part of the webpage.
Check the image below to see how both tags are used:
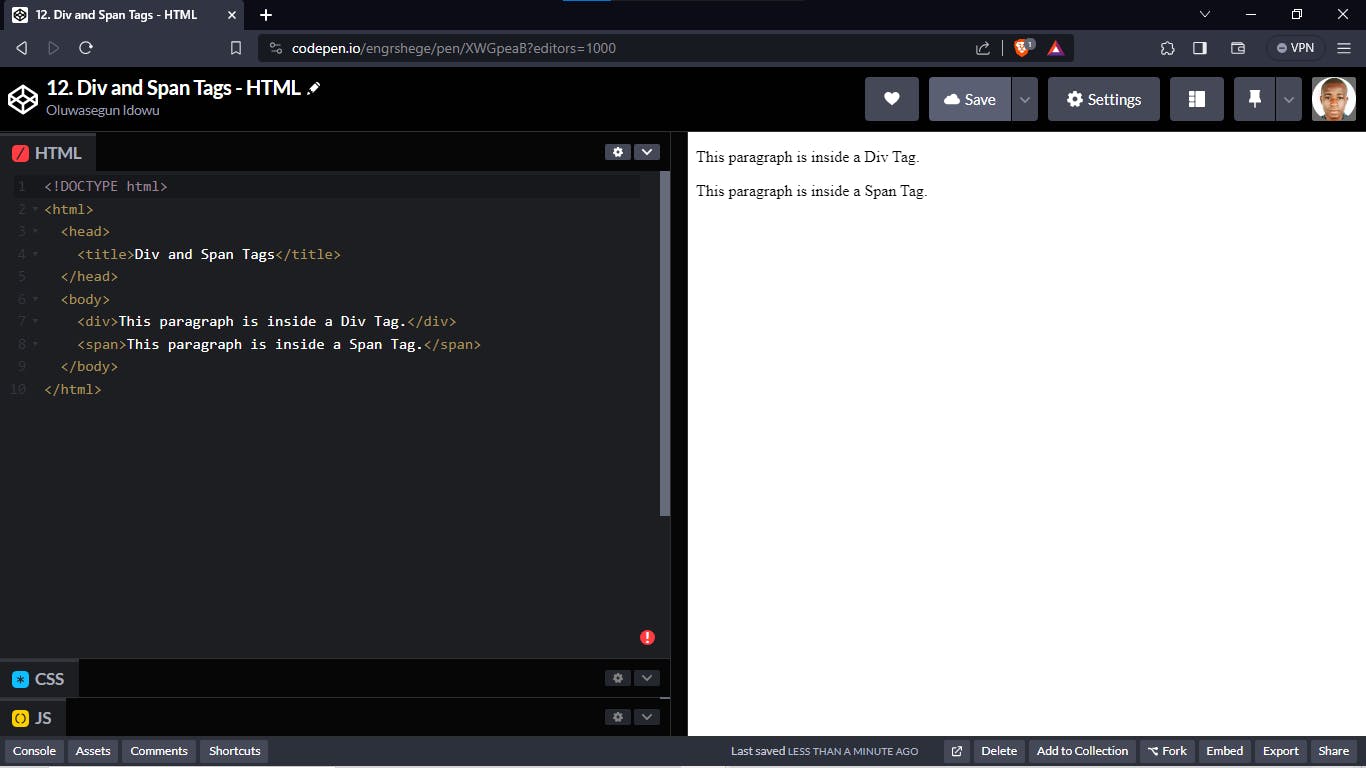
Click the link below to check the code for Div and Span Tags on my CodePen account:
https://codepen.io/engrshege/pen/XWGpeaB
Comment Tag <!-- -->
The Comment Tag <!-- --> is used in giving descriptions about your code. When working with teams, it is ideal to comment on certain parts of your code, so that other developers can understand how your code works.
Note: Comments are only shown in the source code, it doesn't get revealed or displayed on the website.
Check the screenshot below to see how the comment tag is used:

Click the link below to check the code for how a Comment Tag is used on my CodePen account:
https://codepen.io/engrshege/pen/zYbZPaO
HTML vs HTML 5
Let's quickly talk about the evolution from HTML to HTML 5
When HTML got started in 1989 to 1991, it wasn't as elaborate because it didn't have many features as it has now.
We want to make sure that all these browsers play nicely and understand our HTML rules. If you remember Sir Tim Berners-Lee, the guy who created the World Wide Web and our first web developer; has a governing body that establishes what HTML should look like so that these individual browsers can know how to build their browsers so that it reads HTML properly.
Obviously, the web we had in the 90's is very different than the one that we have now. There are lots of new things that has been introduced; some of those things are our phones and now we have tablets. This means that overall, we need more power from HTML.
There has been many evolutions of HTML before now, but HTML 5 is the present evolution where we try to add on features, so that we can improve the user experience.
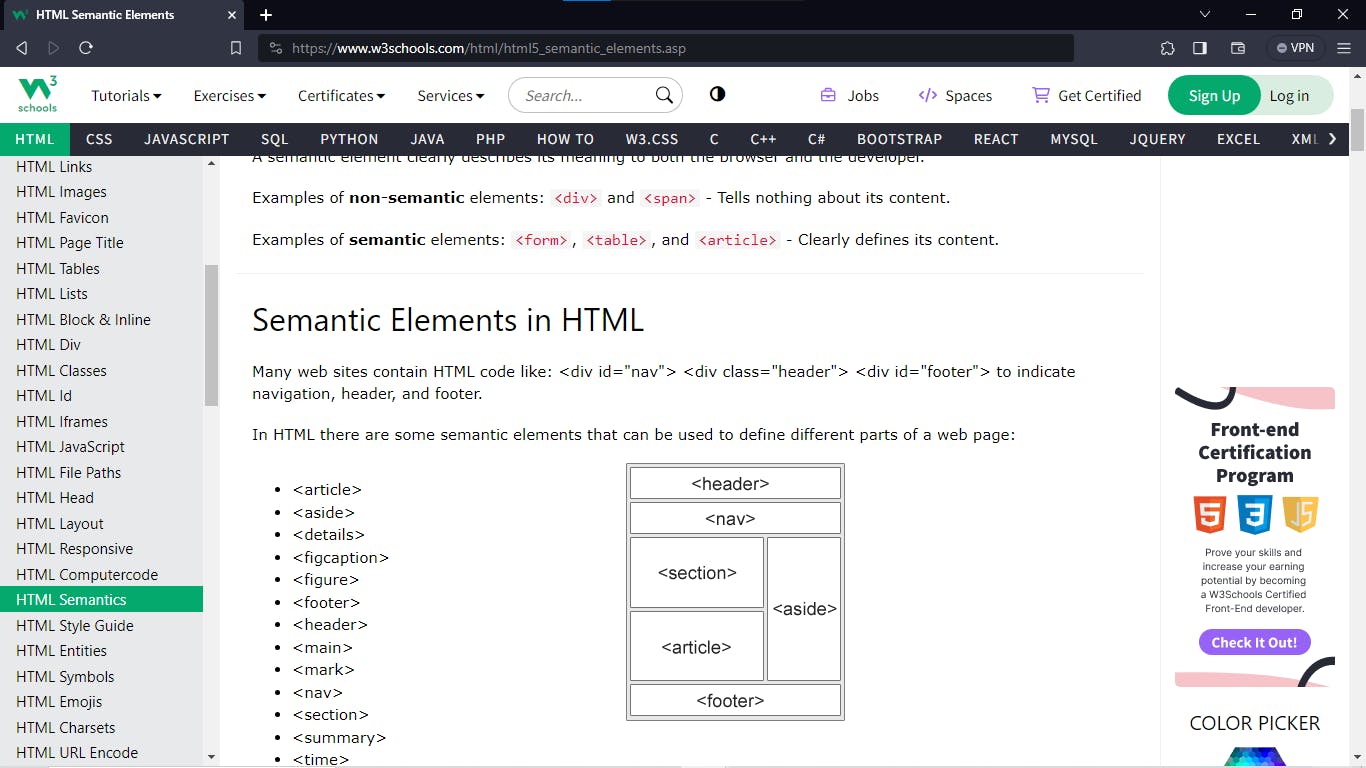
Now, what are some of those added features? Let's take a quick look at our friend w3schools on their article about HTML 5 Semantic Elements via the link below:
https://www.w3schools.com/html/html5_semantic_elements.asp
One of the things HTML 5 wants to do is to make sure it doesn't affect any old website. If you remember that, the very first website from Sir Tim Berners-Lee in 1991 which we visited still works till date. This means that you can still visit websites from the 90s because HTML is trying to make sure everything is backwards compatible; that's a fancy way of saying older versions are not obsolete.
One thing we need to emphasize on is that HTML 5 introduced this idea of semantic elements and what that means is; they wanted to make websites more descriptive, so that search engines such as Google can go on websites and they use these things called crawlers to look through your website for relevant information which matches up with searches from users and as well rank your website.
This idea of HTML 5 is to help improve the SEO (Search Engine Optimization) of your website. HTML 5 Semantic Elements tries to add a little bit more meaning for these robots so that when they encounter something, it makes a little bit more sense. Below are examples of the new tags introduced in HTML 5 Semantic Elements:
Thank you for reading my blog post. Kindly follow me for more design updates.
The journey gets better! 💪...
#Figma #ProductDesign #UXUIDesign #UXUI #UIUXCourse #Branding #BrandStrategy #UIElement #Design #DeveloperFundamental #HTMLTags #SelfClosingTags #AnchorTags #Relative #Absolute #HTMLForm #HTML #HTML5 #SemanticHTML #Udemy #UdemyCourses #ZTM #ZeroToMastery #DocumentingMyTechJourney #BuildingMySkillset #TechSkill #SkillSets #ProductDesigner #EngrShege #ES